Wednesday, December 21, 2022

Invoking Windows Service Manager from a PowerShell Console

I worked in an environment where the only way to have administrative rights was from a PowerShell console. I fully recognize that Windows services can be fully managed via PowerShell cmdlets but to simplify things, I needed to run Windows Service Manager.

To invoke Windows Service Manager from PowerShell, run services.msc from a PowerShell console where the PowerShell console is running with administrative priveledges:


Services.msc as expected launches Windows Services Manager which can run because it inherited the administrative privileges of the PowerShell console:


Saturday, November 26, 2022

Azure: Generate a Bicep Template from an Existing Azure Resource using Visual Studio Code

Overview

The post presents how to generate a Bicep template from an existing Azure resource. The impetuous behind this post was an Azure application I was developing. I used Bicep to create eighty percent of my Azure resources:

  • Storage Account
    • Blobs
  • App Service Plan
    • App Service
  •  Service Bus
    • Queues

For Bicep development I used:

  • Visual Studio Code
  • Microsoft's PowerShell extension for Visual Studio Code
  • Microsoft's Bicep extension for Visual Studio Code: see Appendix A at the end of this post for instructions on how to install Visual Studio Code's Bicep extension

The application required Logic Apps and to create/configure the Logic Appls correctly, I used the Azure Portal (portal.azure.com). To complete the Bicep used to create the project's Azure resources, the Logic Apps needed to be Bicep-ized.

The steps required to extract a Bicep template for an existing Azure resource (such as a Logic App) are as follows:

  • Get the resource ID for the Azure resource for which to create a Bicep template
  • Use Visual Studio Code's Bicep extension to Insert the resource which will create the Bicep template for a given resource ID

The next two sections of this post present how to acquire the id of an Azure resource and how to generate a Bicep template from an Azure resource ID.

Get an Azure Resource ID using Visual Studio Code

To display, a resource's ID using Visual Studio Code, the Azure Resources extension can be used. This extension is installed as part of the Azure Tools extension (a package of multiple Azure-related extensions).  The previous post, Azure/Visual Studio Code: Installing Azure Tools Extension and Overcoming Azure Login Issues, demonstrates how to install the Azure Tools extension for Visual Studio Code. The previous post also discusses how to overcome login issues pertaining to the Azure Resource extension.

To invoke the Azure Resources extension which will be used to determine the target Azure resource's ID, click on the A-ish-shaped icon at the bottom of Visual Studio Code's activity bar. This will launch the Azure Resource extension:


As shown above, typing SHIFT+ALT+A simultaneously will also launch the Azure Resource extension:


Log in using your Azure credentials and if Azure Resources fails to log in after entering the correct credentials see the previous post, Azure/Visual Studio Code: Installing Azure Tools Extension and Overcoming Azure Login Issues, for instructions on how to address log-in issues with the Azure Resources extension.

After successfully logging into Azure, the Azure Resources extension displays, by default, the resources by resource type:


Recall that a Bicep template will be generated for a project's Logic Apps and Logic Apps are not in the resource types listed above. To remedy this, hover with the mouse over the Resources node in the tree of entities displayed by the Azure Resource extension:  


Click on the Group By button at the top of the Azure Resources extensions where the Group By button is the icon to the right of the + icon. Clicking on the Group By button displays a menu of Group By options:


From the group by drop-down, select Group by Resource Group shown below. Once the Azure resources are grouped by resource group it is easy to navigate to the project's Logic Apps or any resources associated with a resource group.

A truncated example of the per-resource group's resource is shown below where the image was truncated given the sensitive nature of resource names:


Right-click on the resource for which the Bicep template will be generated. This displays the following drop-down menu:


From the menu items, select View Properties which displays the properties as JSON file in a Visual Studio Code editor window:


Again, given the sensitive nature of Azure resource names and ID's, the properties of the resource are truncated. Obviously, the ID for the resource is easily identified.

There are other ways to get the ID for an Azure resource. These alternatives are addressed in the following sections of this post:
  • Appendix B: Get an Azure Resource ID using Azure Portal
  • Appendix C: Get an Azure Resource ID using the Azure Resources web app
  • Appendix D: Get an Azure Resource using Azure CLI

Bicep Extension Generating a Template using an Azure Resource ID

Before using the Bicep extension for Visual Studio Code, create an empty Bicep file into which the Bicep extension will copy the Bicep template for a given Azure resource based on the Azure resource's ID.

For this project, an empty file named, logicapp.bicep, was created.

The commands associated with Visual Studio Code's Bicep extension are invoked using Visual Studio Code's Command Palette (see: Command Palette). To display the Command Palette type the following keys simultaneously CTRL+SHIFT+P:


In the Command Palette's text box type: Bicep: Insert Resource until the command is recognized:


After selecting the Bicep: Insert Resource command in the Command Palette the following prompt is given based on the bicep files in the folder currently opened by Visual Studio Code:


From the list of files above, the file, logicapp.bicep, was selected. Once a file is selected, the following prompt is displayed:


Enter the resource ID previous looked up in the text box and press ENTER. This will generate the bicep template associated with the Azure resource ID. A truncated version of the Bicep file generated for the Log App is as follows:


Appendix A: Install Bicep Extension for Visual Studio Code

From Visual Studio Code's activity bar, select the extensions icon (the icon composed of four squares):


In the search box for extensions, enter the term, "bicep" which will display Microsoft's Bicep extension for Visual Studio code:


The landing page for the Bicep extension is as follows. Click on the install button to install the Bicep extension for Visual Studio Code:

Appendix B: Get an Azure Resource ID using Azure Portal

See the "Option: Get the resource ID from the Azure Portal" section from Tobias Zimmergren's blog, Generate Bicep templates from existing Azure resources with VS Code. This section of Mr. Zimmergren's blog is as follows (in case the link ever ceases to work):


Appendix C: Get an Azure Resource ID using the Azure Resources web app

See the "Option: Get a Resource ID with the Azure Resources web app" section from Tobias Zimmergren's blog, Generate Bicep templates from existing Azure resources with VS Code.

Mr. Zimmergren's blog in this section presents using https://resources.azure.com/ to retrieve the ID of an Azure resource.

Appendix D: Get an Azure Resource using Azure CLI

See the "Option: Get a resource ID using the Azure CLI" section from Tobias Zimmergren's blog, Generate Bicep templates from existing Azure resources with VS Code. This section of Mr. Zimmergren's blog is as follows (in case the link ever ceases to work):


Azure/Visual Studio Code: Installing Azure Tools Extension and Overcoming Azure Login Issues

Visual Studio Code's Azure Tools Extension can be invaluable when developing for Azure. This extension installs a package of Azure-relate extensions including (this list was update November 13, 2023 to include an additional subordinate extension that was added to the Azure Tools Extension namely Azure Container Apps):

  • Azure App Service
  • Azure Static Web Apps
  • Azure Functions
  • Azure Storage
  • Azure Databases
  • Azure Virtual Machines
  • Azure Resources
  • Azure Developer CLI
  • Azure Container Apps

For instructions on how to install the Azure Tools extension for Visual Studio Code, see Appendix A at the end of this post.

To use the above extensions, such as Azure Resources, a successful Azure login is required. This login can be problematic because at times even with the correct credentials, the extension does not recognize the Azure login. This post describes how to get a Visual Studio Azure-related extension to recognize a successful Azur login.

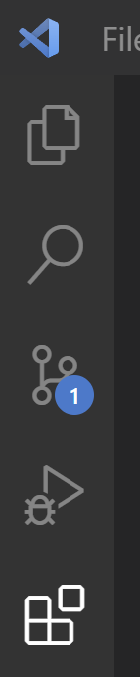
To run the Azure Resources extension, which of course requires Azure login, click on the Azure icon Visual Studio Code's activity bar:


Using to the keyboard to simaltanously select the following keys, SHIFT-ALT-A, will also display the Azure Resources extension as follows:


The above instance of the Azure Resources extension is not currently logged into Azure.

Most of the time clicking on "Sign in to Azure..." above and entering the correct credentials logs in for the Azure Resources extension. There are times when nothing happens. The authentication is handled by a browser and the browser fails to communicate the successful login to the Azure Resources extension. Successfully logging in via the browser which launches one, two, three, or ten times fails to have Azure Resources login.

The steps I have found to get around this are to use PowerShell to perform the following steps from a Visual Studio Code terminal window running PowerShell as the shell: 

  1. clear the Azure context
  2. sign in to Azure
  3. set the Azure context to the desired subscription 

The process is straightforward and requires the name of the Azure subscription to be signed into.

To run PowerShell from Visual Studio, select the Terminal window and make sure that PowerShell is the shell used by the terminal windows. The keyboard sequence CTRL-` (CTRL-backtick) will also launch the Terminal window:


In the terminal windows clear the current Azure context by invoking the Clear-AzContext cmdlet as follows:

Clear-AzContext -Force -ErrorAction:Stop 

Run the Connect-AzAccount cmdlet which will launch a browser that will allow the Azure credentials to be provided:

Connect-AzAccount -ErrorAction:Stop 

Using the subscription name, set the current Azur context using the Set-AzContext cmdlet:

Set-AzContext -Subscription 'enter subscription name here' -ErrorAction:Stop | Out-Null

Set-AzContext -Subscription 'Dev-Test' -ErrorAction:Stop | Out-Null

An example of all the cmdlets run in the terminal window is as follows:


Once successfully logged in the Azure Resources extension appears as follows:


Obviously, where above it says "Dev-Test" a user will see the name of the subscription used to log in.

Appendix A: Installing Visual Studio Code's Azure Tools Extension

To install Azure Tools (or any extension) in Visual Studio, click on the extensions icon in the activity bar (the four boxes):

From the search box enter the name of the desired extension, Azure Tools:


Clicking on the Azure Tools entry displays the following:


Click on the Install button to install. Once install the activity bar will include an A-shaped-icon will appear at the bottom of the activity bar (see below):


Friday, November 25, 2022

Jenkins: Safe Exit/Safe Restart

HTML Table Generator

Jenkins provides a set of administrative commands that manage Jenkins restart and shutdown (exit, safeExit, restart, and safeRestart). These commands are case-sensitive and can be invoked via a URL from a browser. 

To understand these commands, the concept of Jenkins quiet mode must be introduced. While in quiet mode, Jenkins will not start new jobs. 

When a Jenkins server is safely shut down (exited) or restarted the steps performed are:

  • Run Jenkins in quiet mode
  • Wait for jobs to complete
  • Exit or Restart Jenkins 

Exiting/Restarting Jenkins

The commands are exiting and restarting Jenkins including those taking advantage of quiet mode are case-sensitive (see below). These commands are as follows:

Command Active Jobs Action
Restart Ended without completion Restarts Jenkins server
safeRestart Completed before restart Places Jenkins in safe mode and restarts Jenkins server after all currently executing jobs are completed
Exit Ended without completion Shutsdown Jenkins server
safeExit Completed before Exit Places Jenkins in safe mode and shuts down Jenkins server after all currently executing jobs are completed


The restart, safeRestart, exit, and safeExit commands are invoked for a Jenkins server running on host <jenkins-url> as follows:

https://<jenkins-url>/restart
https://<jenkins-url>/safeRestart
https://<jenkins-url>/exit
https://<jenkins-url>/safeExit

When safeRestart or restart is invoked, Jenkins will prompt as follows:

Click on Yes to restart or navigate away to not restart.

When safeExit or exit is invoked, Jenkins will prompt as follows:


Click on "Retry using POST" to exit (shutdown) or navigate away to not exit (shutdown).

Exiting and Restarting Commands are Case Sensitive

The commands are exiting and restarting Jenkins are case sensitive. For example, attempting safeexit (incorrect) versus safeExit (correct) results in the following being displayed:


For example, attempting saferesart (incorrect) versus safeRestart (correct) results in the following being displayed:


Starting Jenkins

Starting Jenkins: Linux

To start Jenkins after shutdown on a Linux host run the following:

sudo systemctl start jenkins.service

Starting Jenkins: Windows

To start Jenkins after shutdown on a Linux host run the following:

C:\Program Files (x86)\Jenkins>jenkins.exe start

Managing Quiet Mode Explicitly

Jenkins provides commands (also case-senstive for managing quiet) that can enable and disable quiet mode unrelated to server restart or server shutdown. To enable quiet mode run the following from the browser:

https://<jenkins.server>/quietDown

To disable quiet mode run the following from the browser:

https://<jenkins.server>/cancelQuietDown

Other Ways to Restart, Exit and Enter Quiet Mode

Any URL does not need to be invoked via browser. Any of the commands described can be invoked using a variety of technologies:
  • curl: handy b/c it is cross-platform
  • sh: wget
  • PowerShell: Invoke-RestMethod
  • PostMan

Saturday, November 5, 2022

Git: Adding Remote Origin to a Local Git Repo

When working with a new Git repo (ADO git, github.com, etc.), I typically perform a git clone in order and start development in the clone of the remote repo. While on a flight, I found that the Internet was timing out when I performed git clone from the remote repo. The remote repo contained only a Readme.md file but git clone was still timing out.

It was a long flight and I wanted to be able to add/commit files to a repo so I created a folder for the project and created a local git repo using git init:

mkdir projectAbc
cd project Abc
git init

Atlassian provides an excellent explanation of the git init command on git init (to quote):


Once I had stable Internet I want to associate the local Git repo with the project's remote repo hosted in Azure DevOps. To create this association, invoke the git remote add origin <repo URL> command from the root folder of the local Git repo. 

If SSH is used to access the remote repo, then git remote add origin should be invoked as follows where boldface is the URL used to access the remote Git repo:

git remote add origin softwarepronto@vs-ssh.visualstudio.com:v3/softwarepronto/ProjectAbc/ProjectAbc

If HTTPS is used to access the remote repo, then git remote add origin should be invoked as follows where boldface is the URL used to access the remote Git repo:

git remote add origin https://softwarepronto.visualstudio.com/DefaultCollection/ProjectAbc/_git/ProjectAbc


The git remote add command is documented by Github.com at Managing remote repositories (to quote):


Monday, October 24, 2022

Documentation System.Net.WebClient

While working with some legacy code, I needed to read Microsoft's documentation associated with WebClient (see WebClient Class). I found ten issues with the documentation's code sample for WebClient and fixed them.

As a disclaimer, Microsoft's documentation, WebClient Constructor, specifies that WebClient is obsolete (yes, I will even fix the documentation for obsolete classes):


I found seven instances where the WebClient class showed examples of events being subscribed a handler method that was not included in the documentation (all changes to the source were merged into main):


Saturday, October 22, 2022

PowerShell: Installing the latest version of PowerShell on a Windows Client Host

Overview

This post will demonstrate how to install the latest version of PowerShell on a Windows client host. Before installing the latest version of PowerShell it is important to recognize that a given host can have multiple versions of PowerShell installed. It is possible to have PowerShell 5.x and 7.x running on the same host and in fact, this can be quite handy for certain development situations (backward compatibility). After installing the latest version of PowerShell, it will also be shown how to run the previous version of PowerShell (5.x) or the latest version of PowerShell (7.x)

Installing PowerShell

The Microsoft recommended way to install Powershell on Windows 10 and Windows 11 clients is using winget. Microsoft's documentation, Installing PowerShell on Windows, points out that winget is not available on Windows server variants:


To install the latest version of PowerShell: 

1. Launch a PowerShell console window with administrative privileges. 

2. Before installing the latest version of PowerShell, displays the $host variable's Version property using the PowerShell console window.

Notice above that the version of PowerShell installed is 5.1.608 which is not the latest as 7x. is the latest.

3. To determine the latest version of PowerShell available for installation, from the PowerShell console invoke, winget search, as follows:

winget search Microsoft.PowerShell --source winget

Invoking the above command displays the following where both the latest stable version and the latest preview version of PowerShell are displayed:


4. To install the latest stable version of PowerShell, invoke winget with the following options:

winget install --id Microsoft.Powershell --source winget

Invoking the above command in a PowerShell console window displays the following:


Installing PowerShell 7.x will uninstall PowerShell 6.x. PowerShell 5.x can be installed on the same host as PowerShell 6.x and PowerShell 5.x can be installed on the same host as PowerShell 7.x.

Running the Latest Version of PowerShell

After installing the latest version of PowerShell, display $host.Version in the PowerShell console window one more time:


Notice in the screenshot above that the version of PowerShell running in the console window is 5.1 but the latest version, PowerShell 7.2.6 was installed.  Microsoft documentation, Migrating from Windows PowerShell 5.1 to PowerShell 7, points out that each version of PowerShell is installed in a different location:

To run a PowerShell console, the installed folder is not required.

To run PowerShell 5.x invoke:
  powershell.exe

To run PowerShell 6.x or 7.x invoke:
  pwsh.exe

Running a PowerShell 7.x Console

To run a PowerShell 7.x console window:
  • Click on the Windows key and type pwsh into the search textbox (see below)


  • Select "Run as administrator" to invoke a PowerShell 7.x console window running with administrative priveledges: 

Notice in the previous screenshot that the PowerShell console has identified that a new version of PowerShell is available. It is important to note that winget may be delayed by a few days before receiving the latest version of PowerShell. This post was written on October 22, 2022 and PowerShell 7.2.7 was built on October 17, 2022.

Getting the latest PowerShell MSI

Microsoft recommends winget for installing PowerShell (see: Installing PowerShell on Windows). As PowerShell is open source, Microsoft placed the code for PowerShell on Github, PowerShell. The page in Github containing all installable releases of PowerShell (as downloadable MSI files). The installers on Github include the latest release is PowerShell releases:


The screenshot above shows that PowerShell 7.2.7 was made available on Github on October 20, 2022, hence winget still considers PowerShell 7.2.6 as of October 22, 2022.

Visual Studio Code

At some point, a Microsoft tool will prompt you to upgrade to the latest version of PowerShell. Below is a dialog displayed by Visual Studio Code will editing a PowerShell file (*.ps1):


The prompt was seen on October 23, 2022, six days after the release was built (October 17, 2022).

Installing PowerShell Preview Version

If the latest preview version of PowerShell, invoke the following from a PowerShell console window running with administrative permissions:

winget install --id Microsoft.Powershell.Preview --source winget


Friday, October 21, 2022

Updating XML documention: XML schema (XSD) validation with XmlSchemaSet

In my never-ending quest to keep Microsoft's documentation, I noted the following in XML schema (XSD) validation with XmlSchemaSet:


The code above subscribes to an event by creating a new delegate instance (new ValidationEventHandler) which was how code was written in for C# 1.0 to 1.1 (2002-2004):

  booksSettings.ValidationEventHandler +=
    new ValidationEventHandler(
      booksSettingsValidationEventHandler);

As of C# 2.0 (released in 2005) there is no need to explicitly create a delegate instance when subscribing to an event:

  booksSettings.ValidationEventHandler +=
    booksSettingsValidationEventHandler;

The updated code is as follows:

I created a fork in Microsoft's documentation (open source on Github.com) and within twenty-four hours Microsoft accepted the change and merged the code: