Visual Studio Code's Azure Tools Extension can be invaluable when developing for Azure. This extension installs a package of Azure-relate extensions including (this list was update November 13, 2023 to include an additional subordinate extension that was added to the Azure Tools Extension namely Azure Container Apps):
- Azure App Service
- Azure Static Web Apps
- Azure Functions
- Azure Storage
- Azure Databases
- Azure Virtual Machines
- Azure Resources
- Azure Developer CLI
- Azure Container Apps
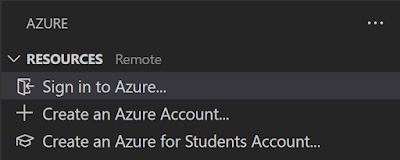
The above instance of the Azure Resources extension is not currently logged into Azure.
Most of the time clicking on "Sign in to Azure..." above and entering the correct credentials logs in for the Azure Resources extension. There are times when nothing happens. The authentication is handled by a browser and the browser fails to communicate the successful login to the Azure Resources extension. Successfully logging in via the browser which launches one, two, three, or ten times fails to have Azure Resources login.
The steps I have found to get around this are to use PowerShell to perform the following steps from a Visual Studio Code terminal window running PowerShell as the shell:
- clear the Azure context
- sign in to Azure
- set the Azure context to the desired subscription
The process is straightforward and requires the name of the Azure subscription to be signed into.
To run PowerShell from Visual Studio, select the Terminal window and make sure that PowerShell is the shell used by the terminal windows. The keyboard sequence CTRL-` (CTRL-backtick) will also launch the Terminal window:
In the terminal windows clear the current Azure context by invoking the Clear-AzContext cmdlet as follows:
Run the Connect-AzAccount cmdlet which will launch a browser that will allow the Azure credentials to be provided:
Appendix A: Installing Visual Studio Code's Azure Tools Extension
Click on the Install button to install. Once install the activity bar will include an A-shaped-icon will appear at the bottom of the activity bar (see below):


No comments :
Post a Comment