Wednesday, February 9, 2022

Docker: Containerizing a Visual Studio 2022 .NET Core Console Application with Docker

When a .NET 6, ASP.NET Core project is created by Visual Studio 2022 an "Enable Docker" checkbox is provided as part of the project creation wizard. Simply checking the "Enable Docker" checkbox adds Docker support to the ASP.NET core web application.

Other Visual Studio 2022 project types including .NET Core console projects are not afforded the option to enable Docker support during project creation. This post demonstrates how to add Docker support to a Windows .NET Core console application support created with Visual Studio 2022. Additionally this post will drill down into the changes made the project and solution when Docker support is added.

Microsoft does provide an excellent tutorial on how to create a .NET Core console application using Visual Studio Code, Tutorial: Containerize a .NET app. The aforementioned tutorial shows there are significantly more manual steps to Dockerize a console project using Visual Studio Code compared to Visual Studio 2022 (just a few clicks).

The steps to add Docker support to a console application are as follows:

1) Create a .NET Core console application (see: Docker: Create a .NET Core (.NET 6) Console Application in Visual Studio 2022 for future Containerization)

2) Setup the console application to be published (see: Docker: Publishing a .NET Core (.NET 6) Console Application with Visual Studio 2022 (a Containerization Prereq)). Technically a Docker Support can be added without configuring publish for the project but it is cleaner to configure publishing for the project.

3) Right click on the .NET Core console project in Solution Explorer (project ForensicDataPusher) and select Add | Docker Support:


4) Once Add | Docker Support is selected the Docker File Options dialog is displayed:


5) Chose the Target OS. For this example Windows will be selected.

Changes Made by invoking "Docker support"

The following write up from Microsoft describes the changes selecting "Docker support" makes to the project Visual Studio Container Tools for Docker (to quote):


The Dockerfile created by clicking on "Docker support" is as follows:


The .dockerignore file is created at the solution level. The .dockerignore file is not visible in Solution Explorer unless it is explicitly added (right click on the solution in Solution Explorer and select Add | Existing Item). The contents of the .dockerignore file created are as follows:


Visual Studio 2022's standard toolbar looks as follows before Docker support was added:


Visual Studio 2022's standard toolbar looks as follows after Docker support is added:


The startup project command changed from ForensicDataPusher (build the solution) to Docker (deploy to Docker).

The ForensicDataPusher .csproj is changed as follows (see the line demarcated in boldface)

<PropertyGroup>
    <OutputType>Exe</OutputType>
    <TargetFramework>net6.0</TargetFramework>
    <ImplicitUsings>enable</ImplicitUsings>
    <Nullable>enable</Nullable>
    <DockerDefaultTargetOS>Windows</DockerDefaultTargetOS>
  </PropertyGroup>
Microsoft documents the DockerDefaultTargetOS project element in Container Tools build properties as follows:


Docker: Publishing a .NET Core (.NET 6) Console Application with Visual Studio 2022 (a Containerization Prereq)

Before a Docker image can be created that hosts an application (such as a console app created with Visual Studio 2022), the artifacts (files) needed to run the application must be created. The process for creating the artifcatds needed to run an application is called publishing. Simply put, an application must be published before it can be copied to a Docker image and the application subsequently containerized.

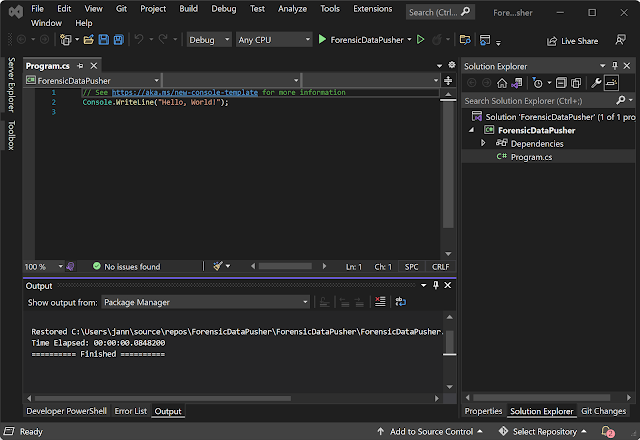
The console application to be published was created in the post Docker: Create a .NET 6 Console Application in Visual Studio 2022 for future Containerization. The newly created project and the solution that contains the project are as follows (opened in Visual Studio 2022):


Configure Publishing

To configure publishing the project, right-click on the project in Solution Explorer and select Publish from the context menu:


The first time the Publish menu item is selected, a wizard is displayed that allows the configuration associated with publishing to be set up. Subsequently clicking on publish will build the project and copy the files that are needed to run the console application to a target folder.

When the Publish menu item is selected for the first time for a given project, the Publish dialog is displayed as follows:


From the Publish menu, select target, Folder, and click Next which still displays the Publish dialog but allows the "Specific target" to be selected (see below): 


For the "Specific target," select Folder and click Next which expands the Publish dialog to include Location as follows:


The "Folder location" is filled in by default with bin\Release\net6.0\publish\. This means that the artifacts required to run the application will be placed in this folder.

Click Finish to complete the configuration of the publishing for the console application. The 

Publishing

To publish the project (after publishing has been configured), right-click on the project in Solution Explorer and select Publish from the context menu which displays the Publish dialog. It is also possible to initiate publishing using Visual Studio 2022's menus and selectin gthe  Build | Publish Selection menu item:


After clikcing on the "Publish Select" menu item, the Publish dialog is displayed as follows:


To the right side of the dialog is a Publish button. Clicking on the Publish button will publish the application by creating the set of files needed to run the application and placing them under the target location (bin\Release\net6.0\Publish).

After a project is published, the Publish dialog is update and will show and entry for "Publish succeeded" or "Publish failed" (see below):


The Publish button was clicked and it is important to note that Visual Studio's current Solution Configuration was set to Debug:


When the Publish button was clicked, a build was run which built Release as the publishing process is associated with the Release Soluiton Configuration. After the build succeeded, the file required to run the application were copied to the publish folder.

The built output shows that publishing invoked a Release build even though the Solution Configuration was set to Debug:


Publishing Configuration File

The file used to store publishing configuration information is FolderProfile.pubxml. This file is found in the project's Properties\PublishProfiles folder: 


The contents of FolderProfile.pubxml reflect the configuraton specified when publishign was setup:


Publish Folder

As discussed in "Visual Studio: Displaying all Files in Solution Explorer," Visual Studio 2022 does not show bin/obj files by default. The published files are under bin folder so to see the files from Solution Explorer toggle on the "Show all Files" button and navigage in Solution Explorere to the publish folder (bin\Release\net6.0\publish):


Tuesday, February 8, 2022

Visual Studio: Displaying all Files in Solution Explorer

By default Visual Studio's Solution Explorer only displays the files that are contained in projects or in the solution.  An example of  Solution Explorer from Visual Studio 2022 is as follows:


The previous solution (ForensicDataPusher) contains a console application project named ForensicDataPusher. Solution Explorer does not show, by default, folders such as bin or obj.

The toolbar at the top of Solution Explorer contains a "Show all Folders" icon:


Hovering over the icon displays its function via a tooltip:


Clicking on the "Show All Files" icon displays all files and folders solution's folder (as follows):


Docker: Create a .NET Core (.NET 6) Console Application in Visual Studio 2022 for future Containerization

In this post, a .NET Core (.NET 6) console application will be created using Visual Studio 2022. In a later post, this console application will be containerized with Docker.

The steps to create a .NET 6 console application with Visual Studio 2022 are as follows:

1) When Visual Studio 2022 is launched the start screen contains a button, "Create a new project." To create a project (including a console application), click on "Create new project:" 


In the event Visual Studio, 2022 was already open File | New | Project can be selected in order to create a new project:


2) When "Create a new project" is clicked on or File | New | Project is invoked, the "Create a new project" dialog is displayed as follows:


3) From the "Create a new project" dialog, select the "Console App" options and click Next. Note that in the description the project is identified as a .NET Core. After clicking next the "Configure your new project" dialog is displayed as follows:


4) Enter the project name in the "Project name" text box. The project name entered above is ForensicDataPusher. Once the name is entered, click on the Next button which displays the "Additional information" dialog as follows:


5) The "Aditional information" dialog is set to the desired framework, .NET 6.0 (a.k.a. .NET 6.0 (Long term support)). To finalize the project creation, click on the Create button which opens the newly created project in Visual Studio as follows:


Docker: Comments in a DockerFile

Comments can be added to a Dockerfile by placing a hashtag (#) before each line containing a comment. Below is a Dockfile containing comments. The Dockerfile was created automatically by Visual Studio 2022 for a .NET 6, ASP.NET Core Web App when the "Enable Docker" checkbox was checked during project creation. Lines 1, 3, and 4 are comments:


Saturday, February 5, 2022

Windows: WinVer -- How to get the current version of Windows

WSL 2.0 and Docker require a minimum version of Windows, hence it is handy to know the current version of Windows installed. There are multiple ways to get the specific version of Windows currently installed. The Windows utility, winver, displays the current version of Windows running on a machine. Winver can be run from PowerShell or a console window (as follows):


Referencing Install WSL (see below) in conjunction with winver, WSL 2.0 can be installed on the computer on  which winver was run:


Friday, February 4, 2022

Docker: First Merged to master Contribution to docker.github.io

 I have a new project that will use storage in Docker (see Manage data in Docker). I found one section of the documentation to be confusing because it does not distinguish between persisted and in-memory file storage: 


I rewrote the section and it was approved:


And merged into master for docker.github.io:


Here is the original text:


Here is my change: